Thursday, September 3, 2009

NIDS and NIPS

Network Intrusion Detection system (NIDS) and Network Intrusion Prevention System (NIPS) are systems that mainly used to report and alarm when the attack discovered through network's activities. As to response against these attacks, NIDS/NIPS systems have four options that one of them will be reported in network activities' run time based on quality of NIDS/NIPS product. They are:

  1. True Positive: occurs when there is true attack, and reported properly. This IDS/IPS's AIM ;-)
  2. True Negative: occurs when did not report and alarm for legitimate network's activities.It is normal.
  3. False Positive: occurs when reported and alarmed for legitimate network's activities.this is A CUMBERSOME, need more searching to make sure it is attack or not. Unfortunately, most or all NIDS/NIPS are suffering form this drawback.
  4. False Negative: occurs when it failed to detect malicious network activity. This is A DISASTER!!!!

Now we need how to configure and adapt NIDS/NIPS's systems to avoid or eliminate the attacks. For example, to response against SYN Flood and UDP Flood, Snort product will be used here. Before applying that, let us see how can prevent SYN and UDP Floods:

  • SYN Flood:
As we know TCP protocol has 6 flags that they control the TCP's connections. Their functions explained here. Each TCP's connection needs Handshake that consists of three processes that should be conducted to establish the connection as following:

(1) Host A ------ SYN -----> Host B
(2) Host A <--- SYN,ACK ---- Host B
(3) Host A ----- ACK ----> Host B
Host A <- Conn. Estab -> Host B

What does a hacker do? Actually, he sends a lot of SYN (first step) and receive (SYN, ACK) packet. But he wall not send back ACK (step three) to server that causes the server or a victim to be waiting to answer all of these SYN packets that cause DOS/DDOS. Preventing of DOS/DDOS against TCP Handshake can be solved by one of two solutions:

  1. Terminate just the current connection: that allow next connection form same source. This can be done by send to RST flag to SYN (first step) to reset the connection. To implemet that add rst_snd, or rst_rcv, or rst_all depend on your case to Snort's rules.
  2. Block a acker for all time. This can be applied by installing Snort configured with inline feature.

Whereas UDP Flood is sending a lot of packets against a protocol's port that cause DOS/DDOS. Such of this flood can be prevented by sending based on the case one of the following packets:

icmp_net, icmp_host, icmp_port, and icmp_all

last packets report to a hacker the destination is not available that stop or terminate his connections caused DOS/DDOS.

The following part explains the installation and configuration's steps of Snort in order to meet DOS/DDOS's prevention:

First, be a root:
sudo -i
enter a password

Then, install the packages:

apt-get install build-essential libpcap0.8-dev libmysqlclient15-dev mysql-client-5.0 mysql-server-5.0 bison flex apache2 libapache2-mod-php5 php5-gd php5-mysql libphp-adodb php-pear libc6-dev g++ gcc pcregrep libpcre3-dev

Next, change to Snort's directory as setup it:

cd /home/mohd/Desktop/snort-2.8.4.1

then type:

./configure --enable-dynamicplugin --with-mysql


If there is no error, type make (wait until this operation end) then type make install. At this point the installation is finished, now we need to adapt and configure Snort. Type in terminal (you are root) the following commands:


adduser snort
enter password

then type chsh :
chsh snort
and change shell of /bin/true.

next, lock the account:
passwd snort -l


Now, make Snort' folders and configurations, type in trminal:

mkdir -p /etc/snort/rules /var/log/snort
then type each one individually:
chown -R root.snort /var/log/snort
chmod -R 770 /var/log/snort
cp etc/* /etc/snort/
cp rules/* /etc/snort/rules


Edit snort.conf file to make some of adaptations:

gedit /etc/snort/snort.conf &

search RULE_PATH line and replace it with:
var RULE_PATH /etc/snort/rules


At this point, snort's installation is finished, now we need to check it. Type in terminal (the output should be appear like the picture):

snort -v
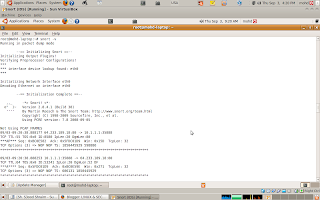


If everything is OK, now we need to configure database and ACID web site to simplify the reading of attacks. Following part depicts that:

change to /var/www directory

ch /var/www

download the base package:
wget http://easynews.dl.sourceforge.net/sourceforge/secureideas/base-1.3.9.tar.gz

tar xvfz base-1.3.9.tar.gz


then allow apache web server to read it's files:

chown -R www-data.www-data base

Install a few Pear modules:
pear install Image_Color Image_Canvas-alpha Image_Graph-alpha


next, open Firefox browser to install (setup) base's web application:

in Firefox type http://localhost/base will present 5 screens. Press continue to start.

First screen: Enter the path to ADODB that is /usr/share/php/adodb


Second screen: enter data base information as it appear it the picture


Third screen: enter admin username/password
Fourth screen: press Create BASE AG button.


Fifth screen: done, now press step 5 link (in the bottom)


at this point, BASE's web application is configured ;-)

Now, we need to configure data base to log snort's packets into data base and use it by previous bast web application; as following:

Login in MySQL data base as a root:

mysql -u root -p
enter a password

then, type:

mysql> create database snort;
mysql> grant all privileges on snort.* to 'snort'@'localhost' identified by 'password';
mysql> exit


then, export data base schemas:

mysql -D snort -u snort -p < /home/mohd/Desktop/snort-2.8.4.1/schemas/create_mysql enter snort's password (that is password).


Edit snort.conf asgain to configure a data base as it appear it the picture;

gedit /etc/snort/snort.conf &


Until here we finished all of the configurations Time now for testing:

to run Snort as a detection system; open new terminal ant type:

snort -v -c /etc/snort/snort.conf -l /var/log/snort/ -i eth0


after that, open the Firefox browser, and type http://localhot/base


and monitor attacks against you ;-)

this post explained Snort as IDS. Next one -inShaAllah- will explain Snort's configuration to be IPS.


the end.

Tuesday, September 1, 2009

DOS & DDOS Attacks 2

In the last post we explained DOS & DDOS's attack by example. In this post we will -inShaAllah- demonstrate the mechanism of prevention of these attacks. First, let me give some explanation how DOS & DDOS attacks happen in more deep details. DOS & DDOS are normally attacks against network stack that called TCP/IP. They mostly focus on fourth layer of OSI which is called Transport layer and fifth layer of OSI which is called Network layer, as a following:

  • OSI's layer four: Transport layer that is has tcp (SYN flood) and udp (udp flood) protocols
  • OSI's layer five : Network layer that is has ip and icmp (ping of death) protocols

As mentioned before, the experiment applied here is ping of death that is against icmp protocol. What is icmp protocol? simply, it is used for reporting for network packets, such as: Is the host on line? Is this packet has delivered to destination?. Just reporting nothing more.

Probably ,you may be decided to DISABLE icmp protocol totally where is not used for delivering or receiving packets and it is just ask and answer: Does the packets delivered? whereas Sending and Receiving is the job of TCP & UDP protocols not icmp. The approach of disabling icmp is absolutely wrong. Why? look to example:

let us take one of icmp's types, e.g. TTL=11.

11 Time Exceeded

Codes
0 Time to Live exceeded in Transit
1 Fragment Reassembly Time Exceeded

We know TTL (time to live type) which is used to report us is the packets arrived to destination or not. Imagine we disabled it who will report us with packet's status, like i sent e_mail to far place but i am not sure is delivered or not. In this case, existence of TTL is very very important and should not be disabled because it used for this function. Obviously idea of disabling all the icmp types is became clear that is wrong. So, just we should disable what is making DOS & DDOS against our servers. In our example, there are two types of icmp that make DOS & DDOS and they are echo and echo-reply types:

Echo:
8 Echo

Codes
0 No Code

Echo-Reply:
0 Echo Reply

Codes
0 No Code

Using of iptables Firewall prevents these stuff of attacks as following:

open a terminal in a victim who has IP=10.1.1.1 and be a root:

sudo -i
enter a password

then type to see rules of Firewall:

iptables -L


Figure 1: no rules in iptables Firewall.


When a victim received a packet from echo (type 8) should answer by echo-reply (type 0). So, to prevent DOS & DDOS we should drop type 8 in INPUT (iptables policy) as a following:

iptables -A INPUT -p icmp --icmp-type 8 -j DROP


Figure 2: iptables after added drop's rule.


Now, ping of death attack is prevented, and no one of attacker's machines do DOS/DDOS.


Figure 3: attacker can not send ping packets (echo type) after a rule has added to a victim's server.

Before ending of this post, we must keep some important points in our mind:
  1. In real Servers, do not disable/enable any protocol's features without discuss IT's team (programmers, data base programmer, system admin, ...). After a good discussion then adapt and configure your server accordingly.Why? To avoid the conflicting of least requirement, such as i configured Firewall to allow just 2 KiB per Second, but the application needs 3 KiB per Second. In this case if i do not correct it all of application's processes will be cancelled!!.
  2. Attacks against TCP that is called SYN Flood and against UDP that is called UDP Flood have different ideas that is better to use NIDS/HIDS beside the firewall. We will see -inShaAllah- how to install and configure them. Snort is example of NIDS and OSSEC is example of HIDS.
  3. It is recommended to SHUTDOWN AND REMOVE all of servers that no need to use it anymore. Such as of these servers, Mail Server, Web Server, Database Serevr, LDAP Server, Samba Server, ftp Server, SSH Server... etc. Not only drop packets destined to port and server still up.

Sunday, August 30, 2009

DOS & DDOS Attacks

Denial of Service (DOS) and Distributed Denial of Service (DDOS) are considering one of the most dangerous attacks nowadays that take the servers to be over. The hacker normally is looking for Root or Administrator privileges that can take all the system control and do whatever he wants like requesting ransom or just appear as a hero. If he could not do that, he will look then for local vulnerability and use it as starting of system's attack. The last option of hacker when he could not get either Root privileges or local vulnerability, he will think to do DOS or DDOS that corrupt your business or transactions.

Conducting of DOS and DDOS can done by sending big amount of packets against the servers that make them busy because they handle these packets. Also, they consume the bandwidth of the network that if any body order the service later, it will be OUT OF SERVICE!!

So, how we can stop or prevent like these attacks? Answering of this question is depend totally on your policy and the network transactions like which ports must be opened and which ones must be closed? Also, which computers can access the servers, ...., and many many factors.

In this post we will - inShaAllah - apply simple experiment (ping of death) that depicts what is exactly the DOS and how we can prevent them.

The requirements of experiment:
The scenario:

Assume one of Ubuntu OS is a victim and install EtherApe software on this operating system. The function of EtherApe software is giving graphical monitoring of network. All of these OS are installed on VirtaulBox, they are as a following:

  • First Ubuntu OS has IP=10.1.1.1 (a victim)
  • Second Ubuntu OS has IP=10.1.1.2
  • Third Ubuntu OS has IP=10.1.1.3
  • XP OS has IP=10.1.1.5
Now, we are ready to do the attack against the victim that has IP=10.1.1.1 , open EtherApe and System Monitor applications in Fisrt Ubuntu (10.1.1.1) to monitor the network and apply the following:


From both, Second & Third Ubuntu OS, in terminal type:

ping -s 65500 10.1.1.1


and from XP OS type in Command Prompt type:

ping -t -l 65500 10.1.1.1


Notice: rate of sent packets reached 320 KiB per second (look to System Monitor application), and it just form three computer (2 Ubuntu + 1 XP). In reality, medium companies are using 4 MiB per second for whole of their bandwidth. Means around 36 computers able to take this company OUT OF SERVICE!!!!!


System Monitor: victim's network activities


The end ;-)

Next post inShaAllah will explain how to prevent such attacks by using iptables Firewall. Keep connected ;-)

Saturday, August 29, 2009

Automatic logout in Ubuntu Servers

Hi my friends, i decided to open my blog that is focusing on Linux and Security. I hope you will get it useful and enjoyable and i hope i can hear from you and we can share the knowledge.

The first post is about:

How to configure: automatic logout in Ubuntu\Debian Server :


As we know in servers platforms (Hosting, ...), they are using only command line that there is no way for using screen-saver as auto log out of users/admin after certain time. Also, sometimes giving limited time for who logged in through SSH-Server or ftp or any thing by terminal. Solving of this problem by doing the following:

first, be a root

sudo -i
enter root password

edit /etc/profile file

# gedit /etc/profile &

add at the end of file TMOUT= number in seconds,

TMOUT=60

the last addition means, log out after 60 seconds.

To test it in your Ubuntu Box, change the TMOUT=3 and save the file. Now open the terminal and type:

sudo -i
enter the password

Now wait for three seconds, you will log out automatically, right?


That is all, i hope it is useful ;-)